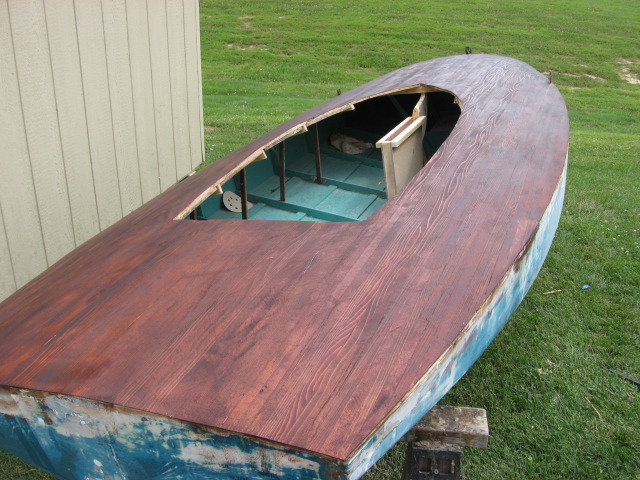
I finished up the coaming. I needed to make an inner coaming as I didn't install it when I did the deck. Just another brain fart. I have some mahogany 1/4 rounds that will fill the gap between deck and coaming. It will also hide the inner coaming.
Monday, October 26, 2015
Friday, September 25, 2015
Fit and finish
I'm slowly getting the boat in order. These are the original splash boards and coaming. They don't quite fit with the new frames but I did clamp them in place and the fit apears to be reasonable. Got to do more sanding and resin work on the deck before that happens. I did get the mast partner made and installed. I used the original as a base and made a new one as a topper. Bottom is one sanding away from paint. I like the shape of this boat.
Thursday, June 25, 2015
I'm Back!
I took about a year off this project mainly because last year I received a commission to build a moth for a fellow in New York. That took most of last winter. I also built two 8 foot prams along the way. Last I left Griff she had the deck done but it was rough. I sanded the entire deck with the belt sander just to knock down the uneven spots. I then went over the entire boat with 60 grit on the orbital sander. The next process was to fill in any cracks and voids with Rockhard wood putty. That stuff is great. The next process is fiberglass but right before that I'm going to stain the deck with red mahogany. Give the boat the old school look that she needs.
The two dinks in the background.
Tuesday, May 13, 2014
Ready for sandpaper
I got all the staples out. There are several moments when building a stripper that are satisfying. Two of them are when you get all the strips in place, the other is when you get all the staples out. I used a box and a half. That's over 1500 staples...
We'll get to sanding next week.
Saturday, May 10, 2014
Staples
It's going to take me a year to get all the staples out! I'm just going to plod along with it. I trimmed off the excess wood and it actually looks like a boat. I also found a new feature on my camera. I kind of knew it was there but I never tried it... Doesn't work here so someone let me know if it works out there... supposed to be a video file.
Friday, May 9, 2014
Stripping is done
I finished up with the strips. Now the hard work starts. Getting all those staples out. I used a box and a half. Each box holds 1250 staples. We used 5 1x6x8 cedar boards. I cut the strips about 3/16 inch. I got about 19 stripes from each board. I got 7 left over. You do the math!...
After the staples I'll use the router with a straight cutting blade to trim the overhangs. Then sanding.
This is what they do around here for fun...
After the staples I'll use the router with a straight cutting blade to trim the overhangs. Then sanding.
This is what they do around here for fun...
Tuesday, May 6, 2014
Almost there
Between the Alberg, the Shelley, and Griff, I'm spread thin. I got more sticks on Griff but I ran out of staples and glue. Looks like it will take one more stick of cedar from Lowe's to finish the deck. The sticks standing up are acting as wedges. That's where I ran out of staples.
Note to self: Don't put your finger right under where you shoot the staple in. It makes for little dots of blood all over the wood.
Subscribe to:
Posts (Atom)